
If you want to make money online, displaying ads on your website will be a good choice. Displaying Google Ads is a great option you wish to use. Simply google provides codes you can easily add to any website whatever the code used to build it, in this article we are going to explain how to embed AdSense codes into your WordPress website using plugins or without.
Contents
Use Google Sitekit Plugin to connect google AdSense to WordPress
In my experience, Google site kit is the easiest way to automatically embed Adsense code in WordPress. It is a WordPress plugin that connects your website to several google services such as Google search console, Google Analytics, Google Adsense, page speed, and Google tag manager. Here are the steps to activate ads on your website:

- Login to your WordPress dashboard
- Go to plugins – Add new plugin
- Search for the Google Sitekit plugin, install and activate
- Now go to the plugin dashboard
- Sign in with your Adsense Google account
- In the settings, you will find the option let sit kit place the Adsense code on your website (recommended) and activate it.
- Wait until ads show on your website within a few hours and congratulations.
This quick Adsense plugin works best if you enable auto ads in WordPress from your google Adsense account settings and show your earnings on your WordPress dashboard.
Embed ad HTML code Using a WordPress plugin
We have 2 options for adding ad codes to your website
If you enable auto ads in your Adsense program dashboard settings
- Simply install a code-inserting plugin to your WordPress site, and activate it.
- Then sign in to your Google Adsense dashboard
- Press Get code then copy it
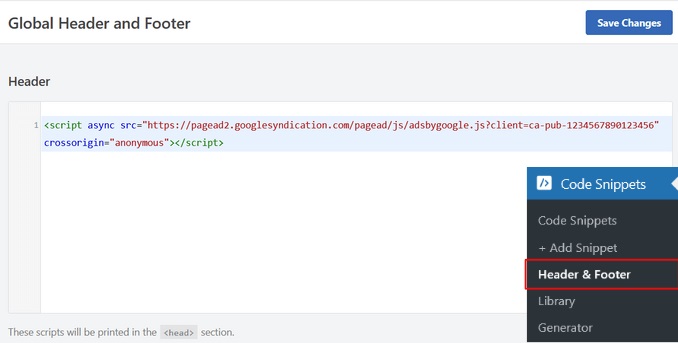
- The Code Snippets » Header & Footer page is the place to start. Afterward, paste your code into the header
- Save settings and now auto ads are activated on your website and might take a few hours to be live.
If you enable to activate the ads by unit (Customized ads placements)
You may use an ad inserter plugin, which makes things easy to insert ad codes into preset placements on your website, follow these steps:
- Sign in to your google AdSense account
- On the left-hand menu click on ads
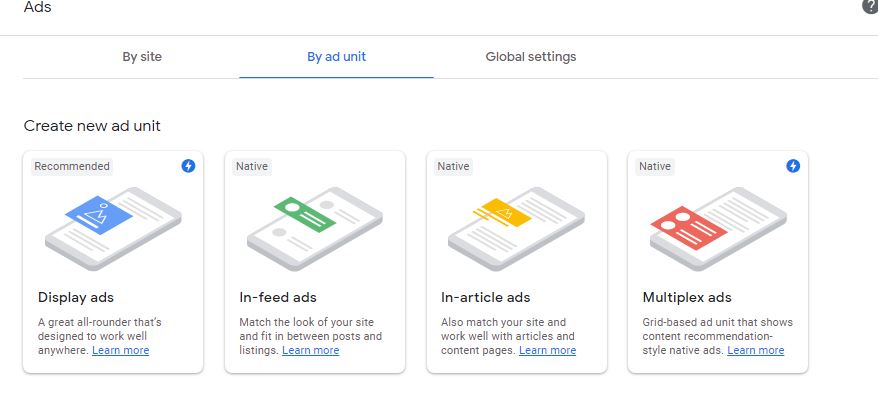
- Click on the By Ad unit tab
- Choose your ad type. There are 4 types ( Display ads – In-feed ads – In article ads and multiplex ads)
- Do not forget to name the ad units, we recommend naming them by the placement name, I.E: above the fold or below the footer, etc.
- Ad units will be listed under (existing ad units) on the same page
- Copy codes from the right-hand items to paste them on your customized placement on your website.
- Go to your WordPress website and install and activate an ad inserter plugin
- Choose where to display ads. ( entire website, pages, or posts only)
- Now you can choose how many ads and where to display them on a page
- Copy the ad code from Google Adsense as mentioned in step 7. Paste them and save
- It might take some time ( almost an hour or two) for ads to be live on your website

Notes about (customized placements) by ad unit
In your account, there is the global settings tab, We recommend ticking on (Let Google optimize the size of your mobile ads) if you do not know exactly how to adjust ad sizes.
Some themes, especially modern news or magazine themes have the option of customized ad placements, so please check your WordPress theme options before installing plugins you do not need.
Add Adsense codes manually to a WordPress website
- Start by clicking on the Ads menu in the left column,
- then select ‘By ad unit’ from the menu.
- Click on ‘Create New Ad’ to proceed.
- In the next step, you will be prompted to select an ad type. You can choose between Display ads, In-feed ads, or In-article ads.
It’s smart to start with display ads if you’re unsure.
- Next, give this ad unit a name and select its type and size.
- You can name the Ad whatever you want, for example, “Above footer”
- Next, choose the ad size. Although Google offers a wide range of ad sizes, certain sizes are listed as recommended because they are the most popular.
- It is also possible to choose whether your ads should be responsive or fixed. It is advisable to choose responsive ads since they work well on all devices and screens.
- To continue, click the Create button.
- Your account will now generate your ad code. This code contains the unique ID of your ad unit as well as your publisher ID.
- Paste your ad code into a plain text editor like Notepad or TextEdit and save the file.
- Next, decide where the ad will appear on your website. In most cases, ads are displayed in the sidebar. WordPress widgets allow you to add Google Adsense to your sidebar.
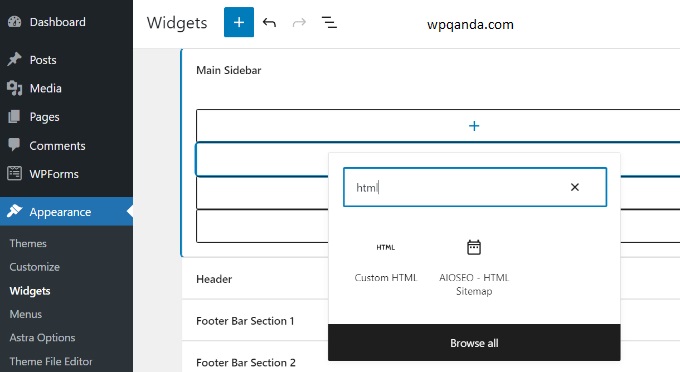
- Go to the Appearance » Widgets page in your WordPress admin area.
- To add a Custom HTML widget block, click the ‘+’ button.
- To display ads, you must enter the code into the Custom HTML widget block.
- Then, click the ‘Update’ button.
1- WordPress vs Shopify Which Is Better for You?
2- WordPress Best Themes for Blog
Conclusion
Displaying google ads on your website is one of the most popular ways to make money online, Just keep in mind that your website is able to be approved by google Adsense, which you can do it easily by applying Google’s latest updates, especially the google spam update and stick to the best practices to keep your revenue live and ongoing.
Google takes full responsibility for the authentication of ads displayed, making authenticity one less thing for you to be concerned about. So, start generating revenue with little to no effort and code away!