Hosting the WordPress website on Google Cloud can improve its exposure because it is one of the fastest solutions to host a business online. The Google Cloud WordPress Migration can be done in two ways. One is more efficient and the other is older but with more support. Depending on what you need, you can pick anyone.
The first method of migrating to Google Cloud WordPress is:
Configure WordPress first
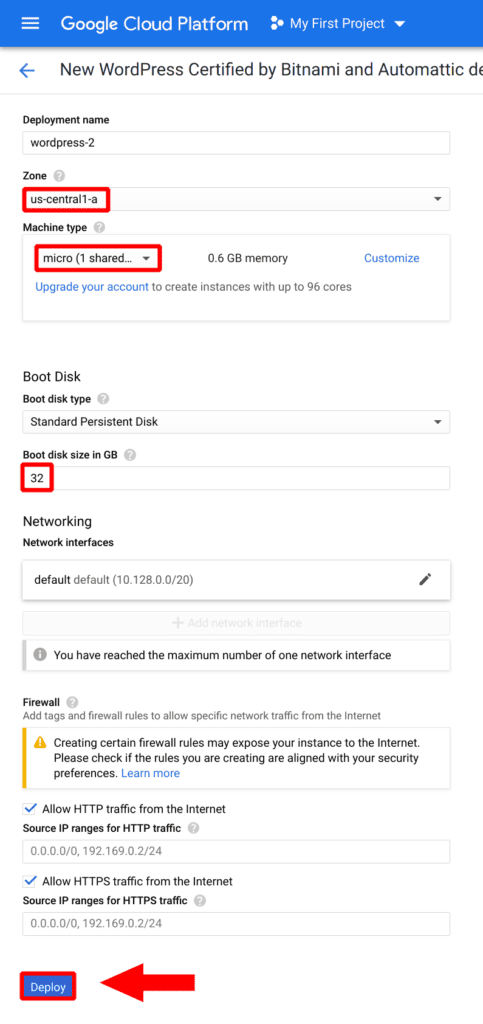
This method shows you how to migrate your WordPress website to Google Cloud using the efficiency configuration, which includes an f1-micro instance and a 32GB persistent disk for an estimated cost of $1 per month.
First of all, install WordPress
- Go to Marketplace from the Google Cloud sidebar menu.
- Enter WordPress into the Marketplace search field, then select Bitnami and Automattic Certified WordPress.
- Start configuring your Google Cloud WordPress instance by clicking LAUNCH.
Customize the deployment
Make sure you change the Zone to represent where most of your visitors are located in your Google Cloud WordPress instance. It’s also possible to upgrade the Machine type and/or Boot disk size. Lastly, click Deploy to deploy your WordPress instance on Google Cloud.
Configure the domain
You’ll need to configure a domain name for your new WordPress website once your Google Cloud WordPress instance has been deployed. Namecheap is used in the tutorial, but the configuration can be used with any domain registrar.
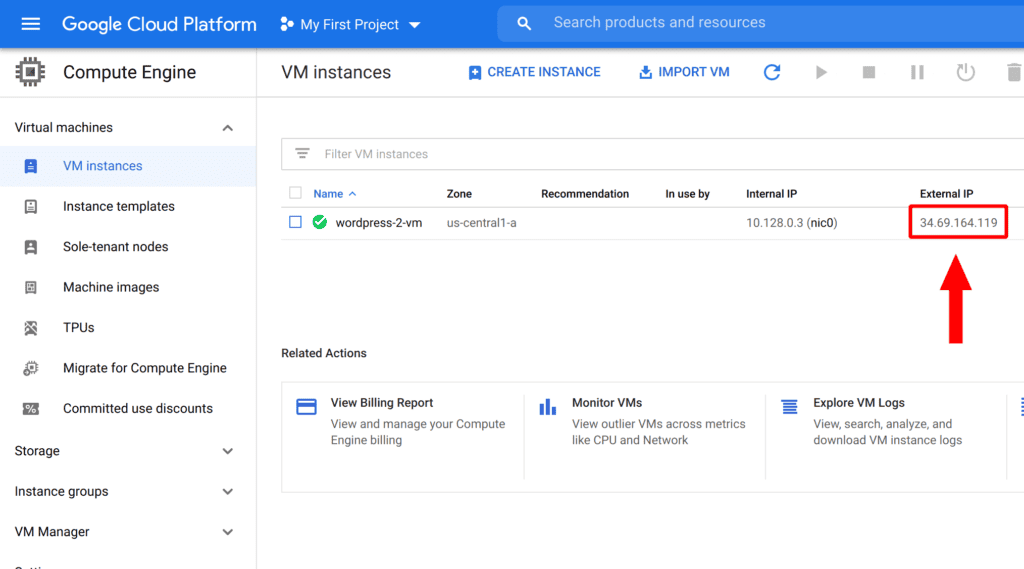
Copy the IP address of the instance
Copy the IP address of your Google Cloud WordPress instance from your VM Instances dashboard.
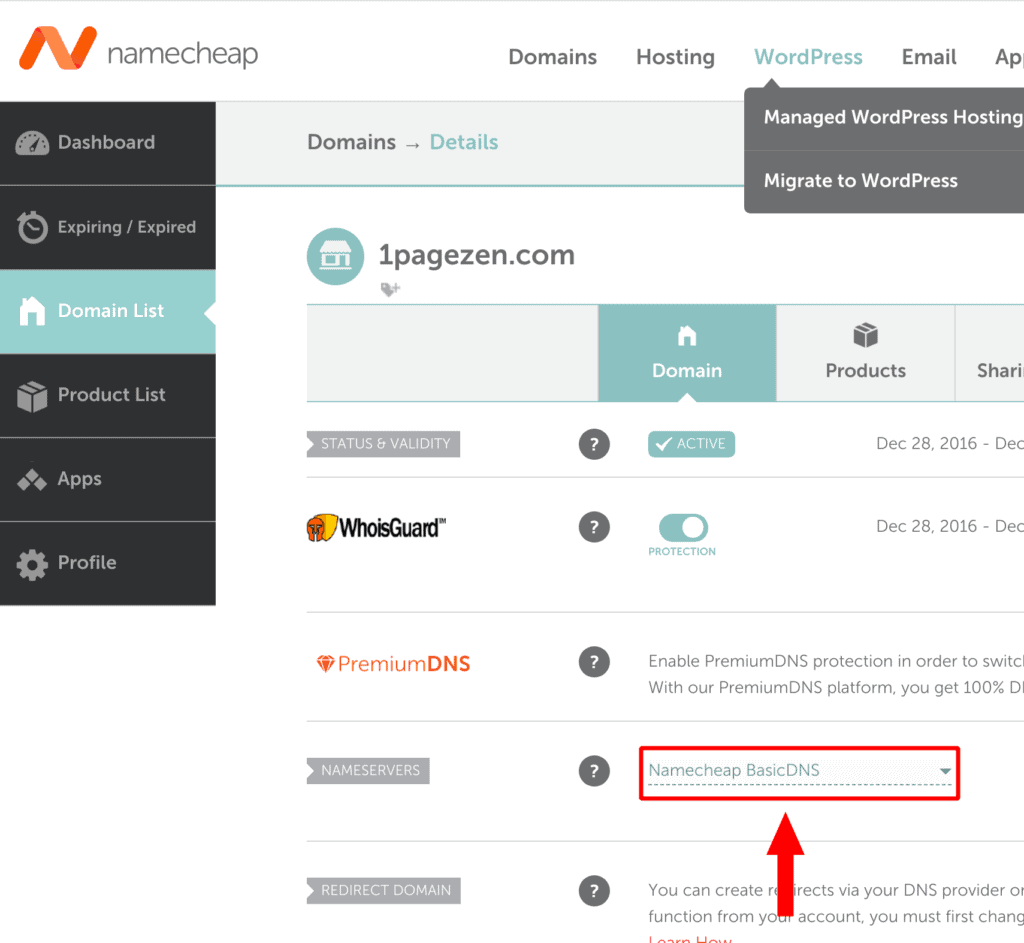
Don’t forget to enable DNS settings
Visit your domain name provider’s website (we recommend Namecheap). From the NAMESERVERS section of your domain settings, select Namecheap BasicDNS.
Set up a DNS record
Go to your domain name dashboard and click Advanced DNS. Create a new A record in the HOST RECORDS row, but replace the IP address in the image with the IP address of your instance (which you copied before). Create a CNAME record as shown, but replace Hevodata.com with your own domain name.
Configure SSL Certeficate
Once you’ve configured your website’s domain name, you’ll learn how to enable SSL. Using the SSH terminal, you’ll connect to your Google Cloud WordPress instance and run a script that automates the process.
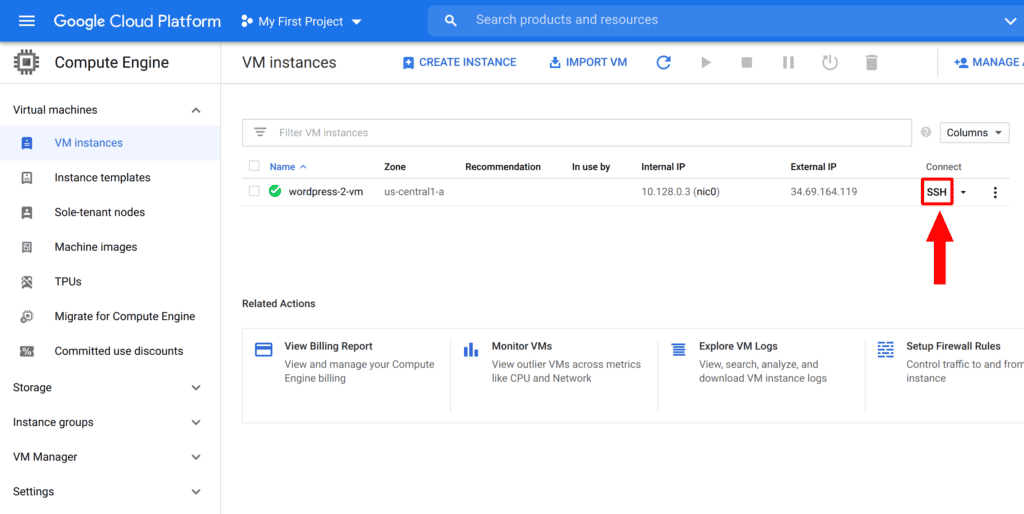
Get your WordPress instance connected to Google Cloud
Click the SSH button on your VM Instances dashboard to connect to your Google Cloud WordPress instance.
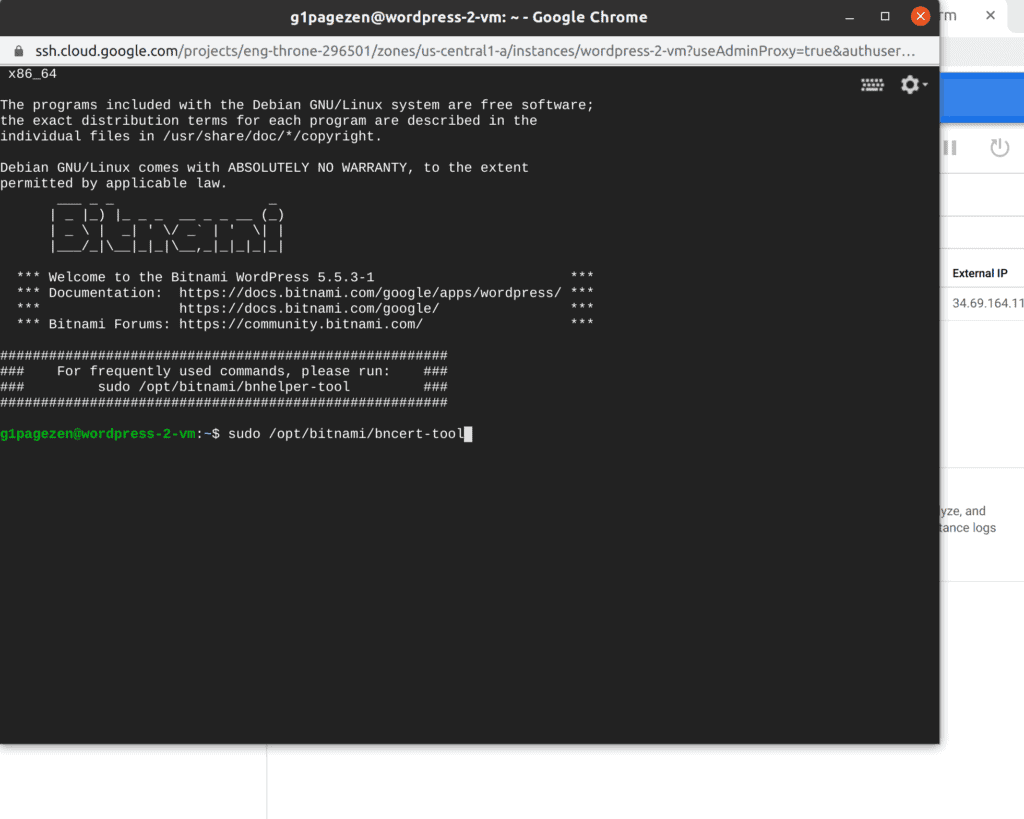
SSL script execute
Once you’ve clicked SSH, a new terminal window will open showing your WordPress instance connection. Press Enter after copying the command in the box below and pasting it into the terminal.
sudo /opt/bitnami/bncert-toolIf you press Enter, the script will ask you a series of questions, and you’ll answer them with a yes or no. Replacing HevoData with your own domain name or email is what we recommend for each question:
- Here’s the domain list: Hevodata.com www.Hevodata.com
- Redirect HTTP to HTTPS [Y/n]: yes
- Enable non-www redirection [Y/n]: no
- Redirect www to non-www [Y/N]: yes
- Do you agree with these changes? [Y/n]: y
- Email: 1pagezen@gmail.com
- Do you agree to the Let’s Encrypt Subscriber Agreement? [Y/n]: y
Go to WordPress and sign in
- Go to Marketplace from the Google Cloud sidebar menu.
- Click Your solutions on the Marketplace dashboard.
- Choose Google Cloud WordPress Migration from your recent deployment.
- From the list, copy both the Admin user and the Admin password (temporary).
- Next, you’ll log into your WordPress website with these credentials.
- Go to your WordPress login page and log in with the username and password you copied from the last step.
Method 2 for migrating WordPress to Google Cloud:
Here’s how to migrate your WordPress site to Google Cloud
- Make sure you edit your DNS records and reduce the TTL.
- Get Google Cloud set up for WordPress.
- Add a new DNS record to Cloud DNS.
- Put a back soon message on it.
- Take a backup of your whole site and import it.
- Go to Google Cloud and import your website.
- Make sure your DNS records are switched.
- Have fun.
Don’t forget to edit your DNS
Reduce the TTL time on your DNS records to 330 seconds. As a result, most users got redirected quickly to the new server.
The DNS TTL should be lowered a few days before migration if yours is higher. It usually takes 24 – 48 hours for DNS to propagate. You’ll get DNS changes to your users faster this way.
Install Google Cloud for WordPress
Use Apache or Nginx to set up Google Cloud WordPress. Ubuntu, Debian, CentOS, and more are also available.
- Compute Engine: Install LEMP.
- Put your WordPress files in Server Blocks.
- Set up Cloud SQL and connect to your instance.
Here’s a directory structure you need.
You can use your original domain name instead of yourdomainname.com.
- Home
- — example.com
- —- logs
- —- public
Your website’s root directory is the public directory.
In Cloud DNS, create your DNS records
- Create a new DNS record with an A record pointing to your VM’s IP.
- Set up your domain’s cloud DNS.
DNSSEC can also protect your domain name from DNS cache poisoning.
Activate a Coming Soon page
- It’s necessary to stop the live site from editing the database during Google Cloud WordPress Migration. Until then, we’ll show a ‘Back Soon’ page.
- You can use index.html instead of index.php by uploading it to your webroot
Make a backup of your whole site
You can now take a backup of your website and database.
- Upload your backup to a Google Cloud Instance once you have it.
- Next, you need to remove all MyISAM engines from your database.
- Since Cloud SQL doesn’t support MyISAM, you’ll have to remove it or replace it with InnoDB.
- Upload your database to Cloud SQL and import it.
Switch DNS records
After everything’s set up, you can update the DNS records with Google Cloud.
Your new server will start routing traffic once you modify your DNS records. If you’ve visited your site recently, you’ll likely still be sent to your old server and see the ‘Back Soon’ page, since DNS queries are cached. Users’ machines should get forwarded to the newly installed server once they re-query the domain’s DNS entries.
Advanced setup options
On Google Cloud, you can set up load balancing and dynamically scale your VM instance during high traffic, and scale down during low traffic.
Final thoughts
This article covers everything you need to know about Google Cloud and WordPress. In addition, it gives two methods for migrating from WordPress to Google Cloud.
Even though Google Cloud WordPress Migration is insightful, setting it up is a hassle. Hevo helps make things easier. You can choose from 100+ pre-built integrations with Hevo Data’s No-Code Data Pipeline.