Once you have a website and need to export data in a professional way, so connecting google sheets to WordPress is a great option to manage your clients, leads, and your company’s online sales. This a great option if you build an online store or courses for remote learning and more. There are several ways to do that but in this article, we are exploring the spreadsheets connection using the WpForms plugin
It’s essential that you install and activate WPForms on your WordPress site before you can get started. You’ll also need a Google account if you don’t have one.
Contents
- Apply Settings for Google Sheets integration
- Connect WPForms to Google Sheets
- Create a new project
- Set up Google APIs
- Select user types
- Register your app
- Add app info
- Set up an app domain
- Add Contact info for developers
- Add scopes
- Add test users
- Review your App Registration
- Publish your app
- Create Application Credentials
- Get Connected to Google sheets
- Integrate your form with Google Sheets
- Configure your connection
- Access Spreadsheet From Form Builder
- Start Google Sheets mapping
- Add Custom value
Apply Settings for Google Sheets integration
You can install and activate the Google Sheets add-on once you’ve installed WPForms and verified your license.
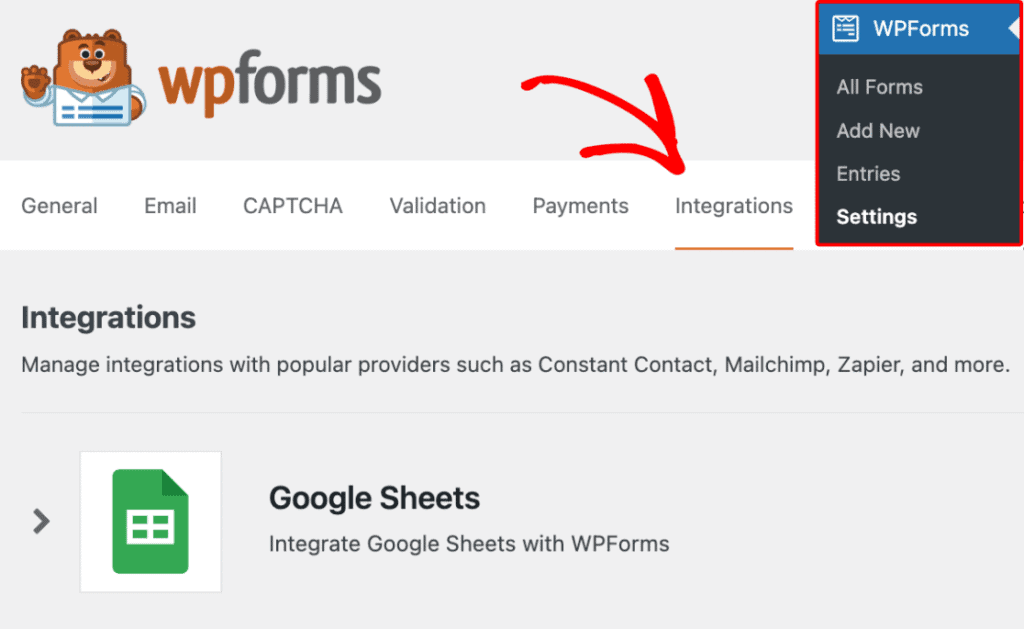
Once you’ve installed the Google Sheets addon, you’ll need to access the integration settings. Click on the Integrations tab in WPForms » Settings in the WordPress dashboard
Connect WPForms to Google Sheets
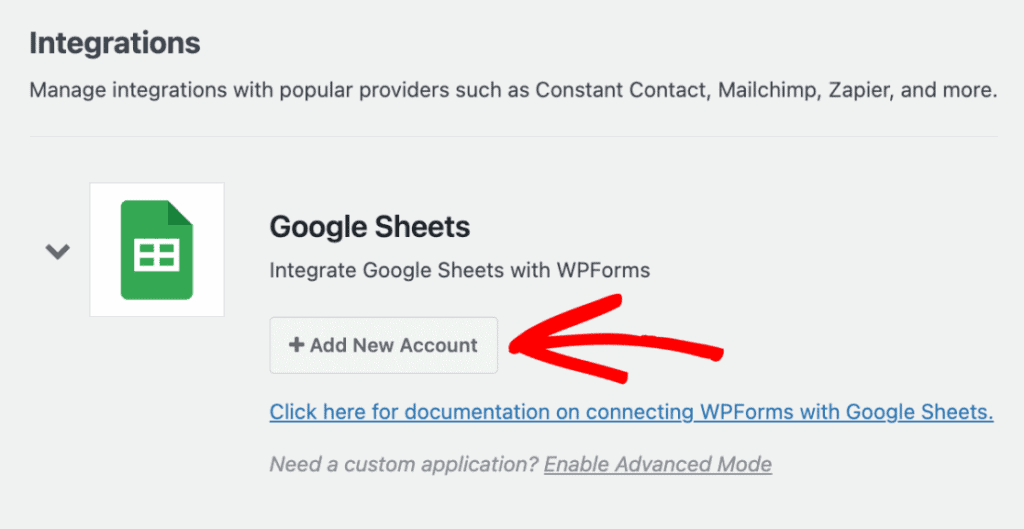
- Click Add New Account to connect WPForms to your Google account.
- WPForms will then redirect you to a Google authentication page where you’ll need to choose a Google account.
- Once you’ve chosen a Google account, click the Allow button to let WPForms access your account.
- Now when you return to WPForms » Settings » Integrations, you should see the green Connected status along with your connection details.
- Start by enabling Advanced Mode in your Google Sheets integration settings.
- The Google Cloud Platform will now show you additional settings.
This step will be skipped for now since you’ll need to sign up for the Google Cloud Platform first. You’ll need to access your WPForms settings later, so we recommend keeping them open in a separate browser tab while you build your application.
Create a new project
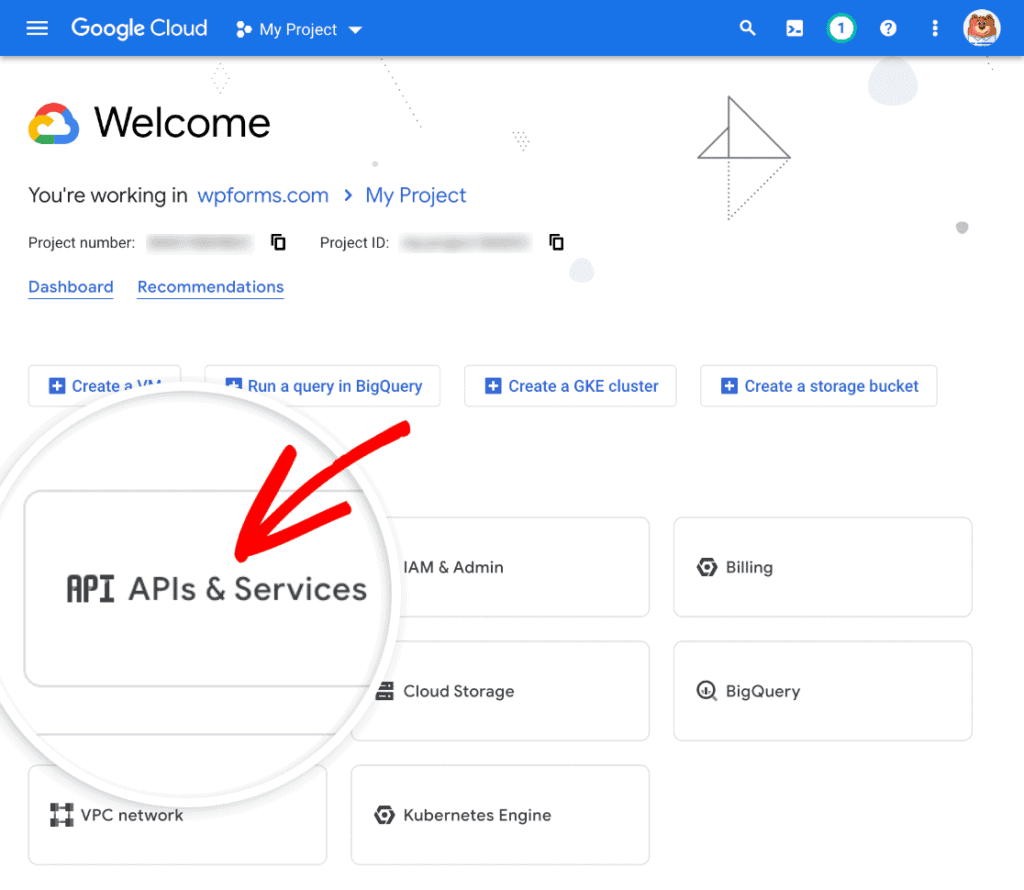
- Click APIs & Services once you’re logged in to Google Cloud Platform.
- Click the dropdown menu for projects.
- An overlay will appear showing your projects. Just click NEW PROJECT.
- Next, give the project a name. Use a name that helps you remember what you’re doing with the project; however, you can use whatever you want.
- Click CREATE when you’re done adding a name.
- When you’re done creating your project, click the project dropdown again.
- Click on the new project name in the overlay.
Set up Google APIs
After you’ve created your project, it’s time to enable Google APIs.
- Click Library on the left side menu to get started.
- Go to the API Library and enable 2 APIs: Google Drive API and Google Sheets API.
- Search for “Google Drive API” in the search bar.
- Click ENABLE once you’ve found the Google Drive API.
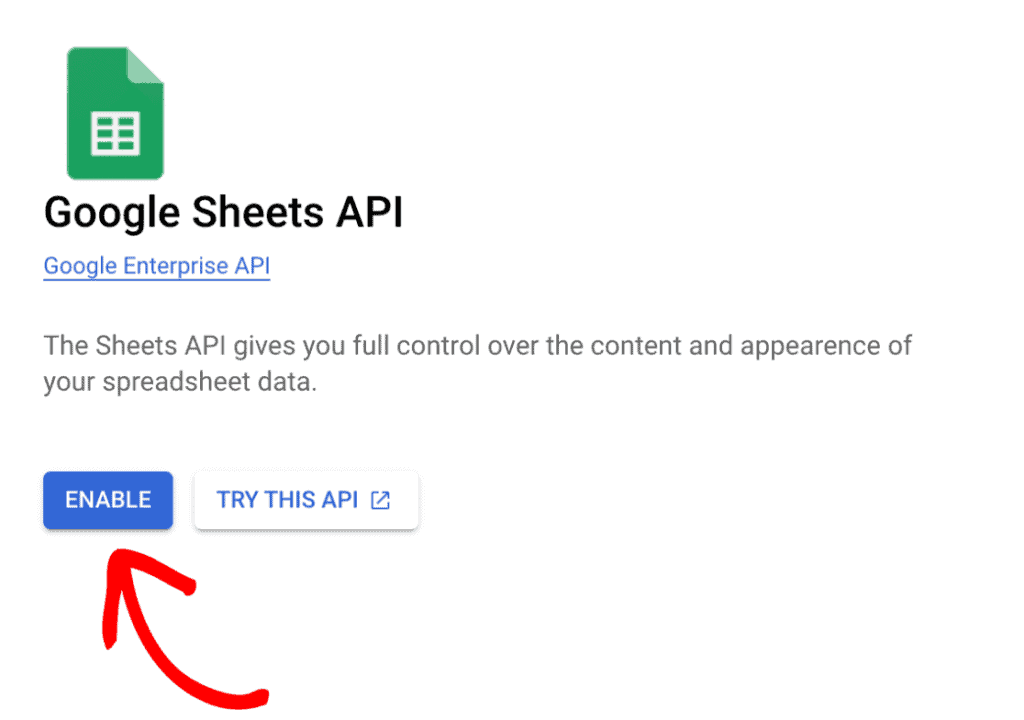
- Go back to Google’s API library and type “Google Sheets API” in the search box.
- Click ENABLE after finding the Google Sheets API.
Select user types
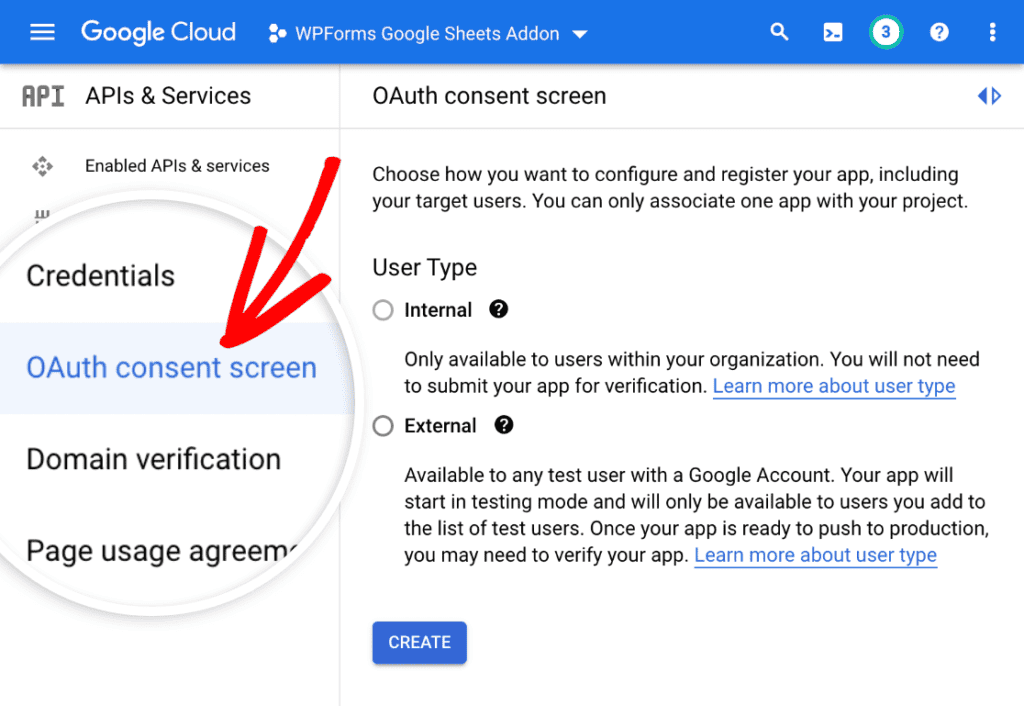
- In the left side menu, click the OAuth consent screen after you’ve enabled APIs.
- Select a User Type for your application on the next screen. Depending on who you’d like to share your app with, you can select Internal or External.
Let’s pick External for our example. Click the CREATE button after making your selection.
Register your app
When you choose a User Type for your app, you’ll be redirected to a registration page. Registering your app involves a few steps, which we’ll cover below.
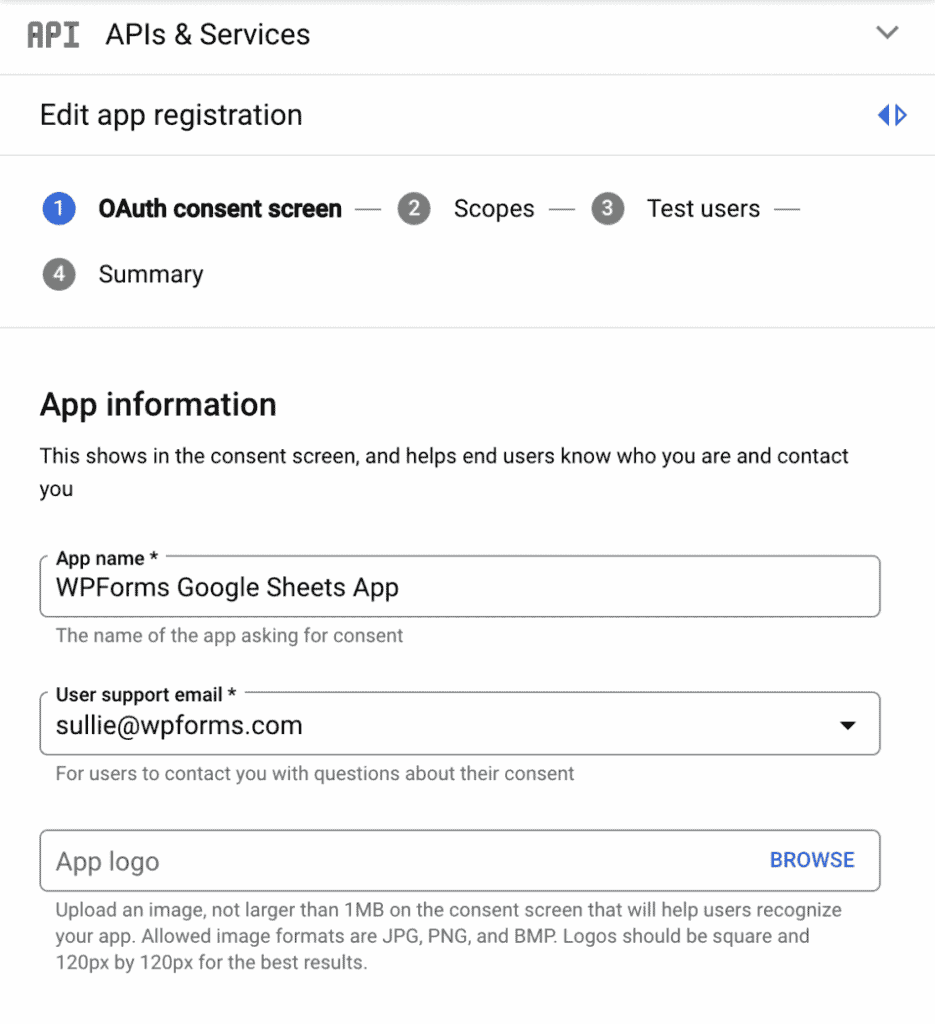
Add app info
Users will know who you are and how to contact you if you add information about your app.
Make sure you fill out the App name and User support email fields.
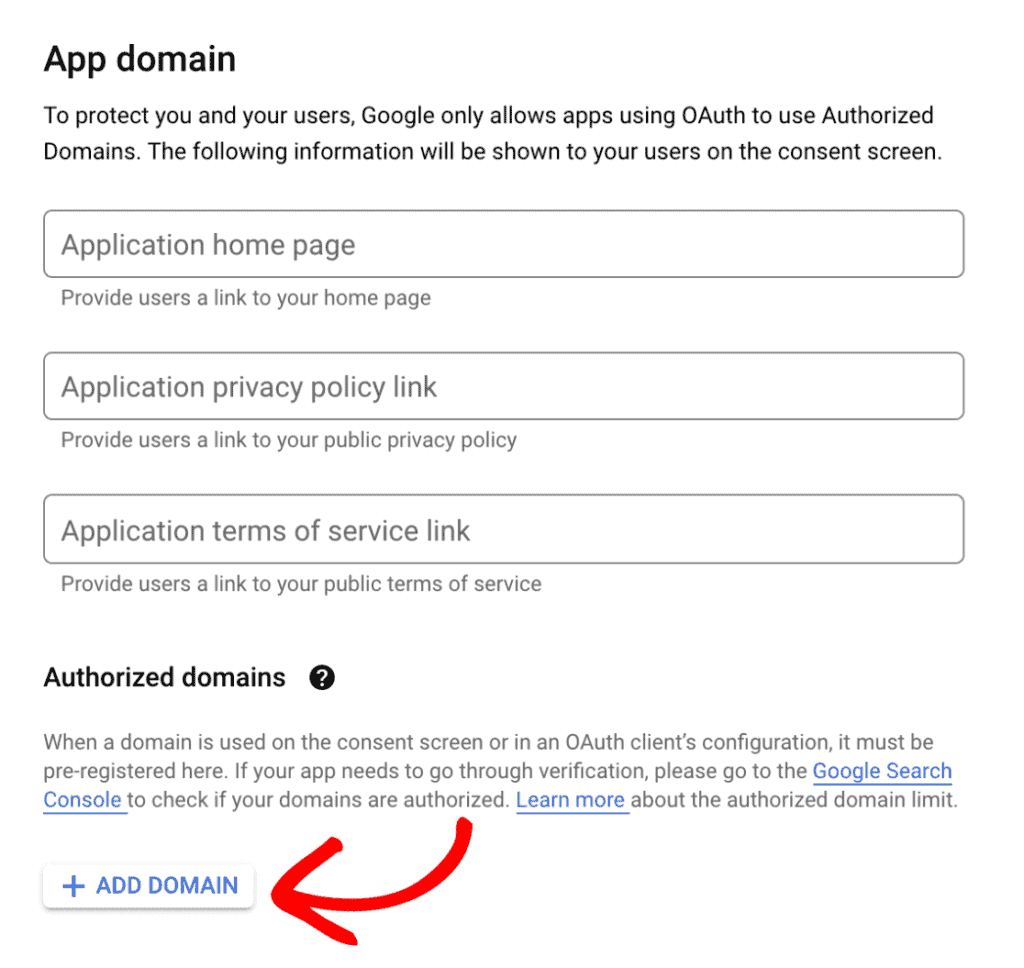
Set up an app domain
The Authorized domains section is under the App domain section.
Click ADD DOMAIN. Your domain should be wpforms.com in the Authorized domain 1 field.
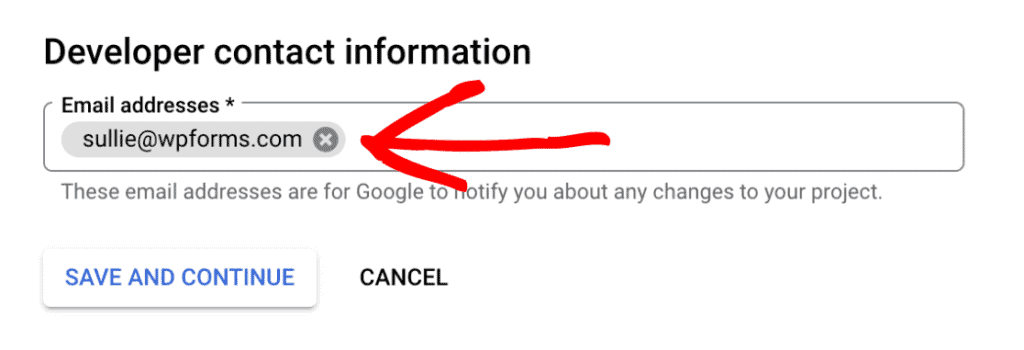
Add Contact info for developers
- Fill out the Developer contact information section with your preferred email address. If your project changes, Google’ll contact you on that email.
- To move on to the next step, click SAVE AND CONTINUE.
Add scopes
- Click ADD OR REMOVE SCOPES on the next screen.
- Click on Enter property name or value in the side modal that appears.
- Go ahead and search for each of these:
https://www.googleapis.com/auth/userinfo.email
https://www.googleapis.com/auth/userinfo.profile
https://www.googleapis.com/auth/drive.metadata.readonly
https://www.googleapis.com/auth/spreadsheets

- Click the checkboxes on the left to enable each of the above scopes.
- Click UPDATE at the bottom of the screen once you’ve enabled the required scopes.
- Return to the Scopes screen to see and manage your enabled scopes. Save your changes by clicking SAVE AND CONTINUE.
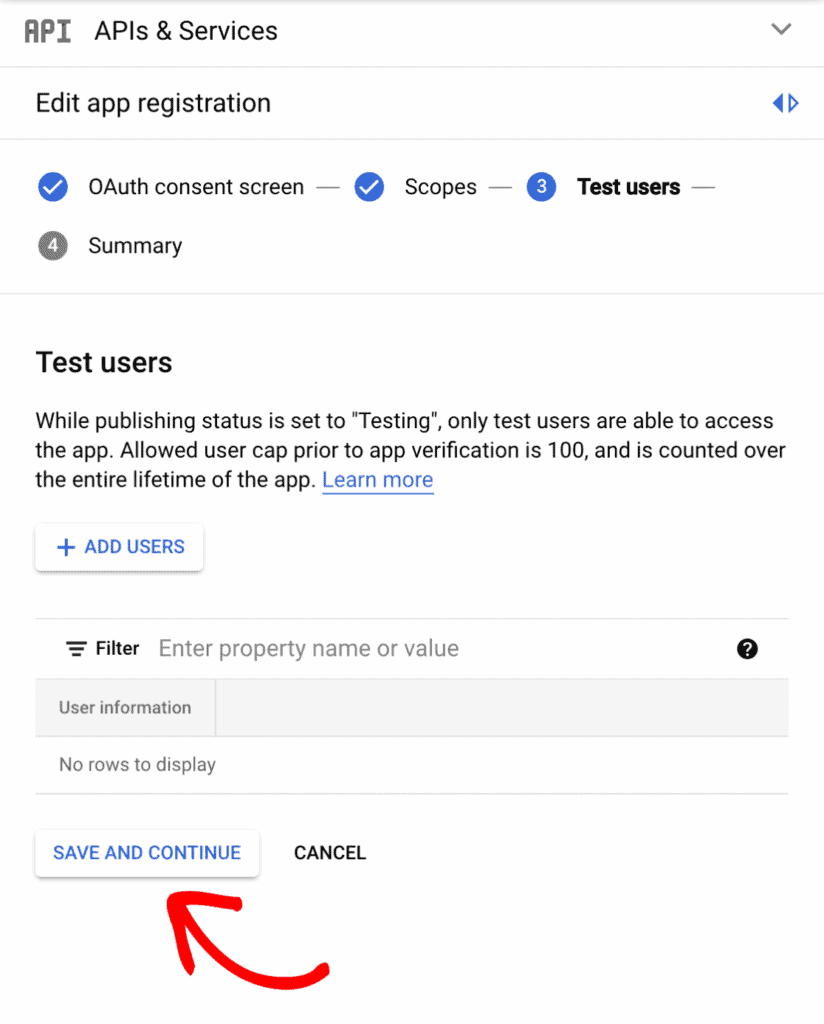
Add test users
Users won’t be able to interact with your app until Google verifies it. You can, however, let specific users test your app before it’s verified. We don’t need this step for our setup, so let’s go ahead and click SAVE AND CONTINUE.
Review your App Registration
On the Summary screen, you’ll review your configuration after app registration. At the bottom of the screen, click BACK TO DASHBOARD if everything looks right.
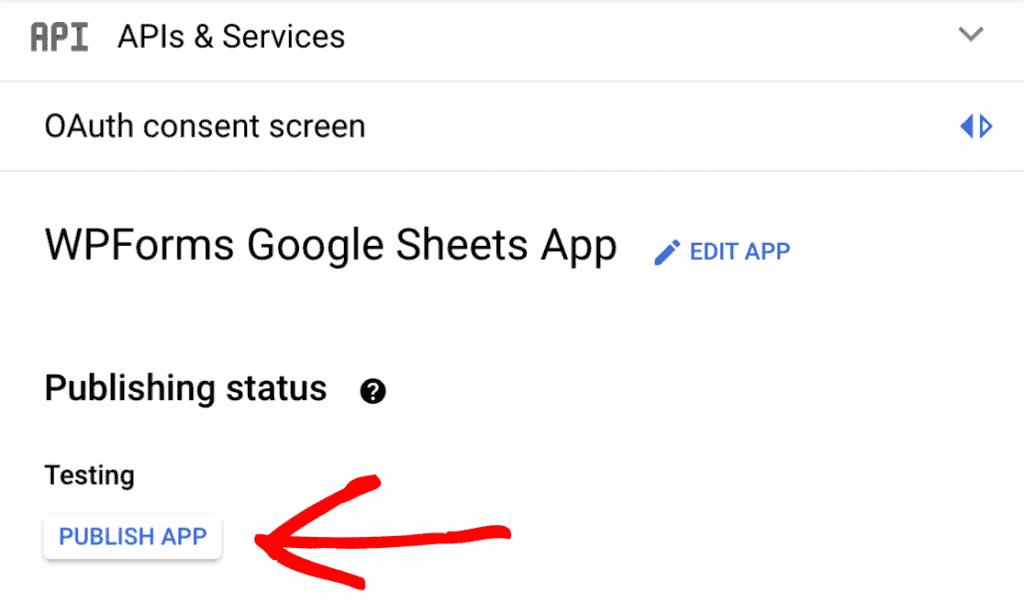
Publish your app
After you’ve registered your app, you’ll need to publish it.
- Click PUBLISH APP from the Oauth consent screen.
- Once you click the button, a modal will appear with some further steps for Google’s app verification.
- Then click CONFIRM.
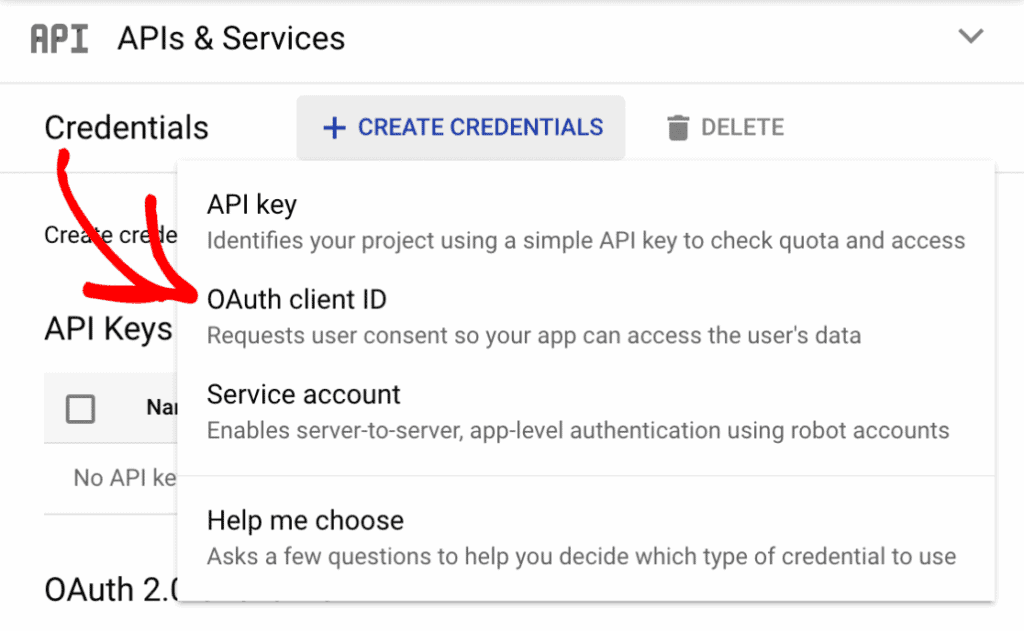
Create Application Credentials
You’ll need credentials for your application next. Click Credentials on the left side menu.
- Then click OAuth client ID.
- Click the Application type dropdown and choose Web application.
- In the Name field, give your Oauth 2.0 client a name. You can name it whatever you want since it won’t be seen by end users.
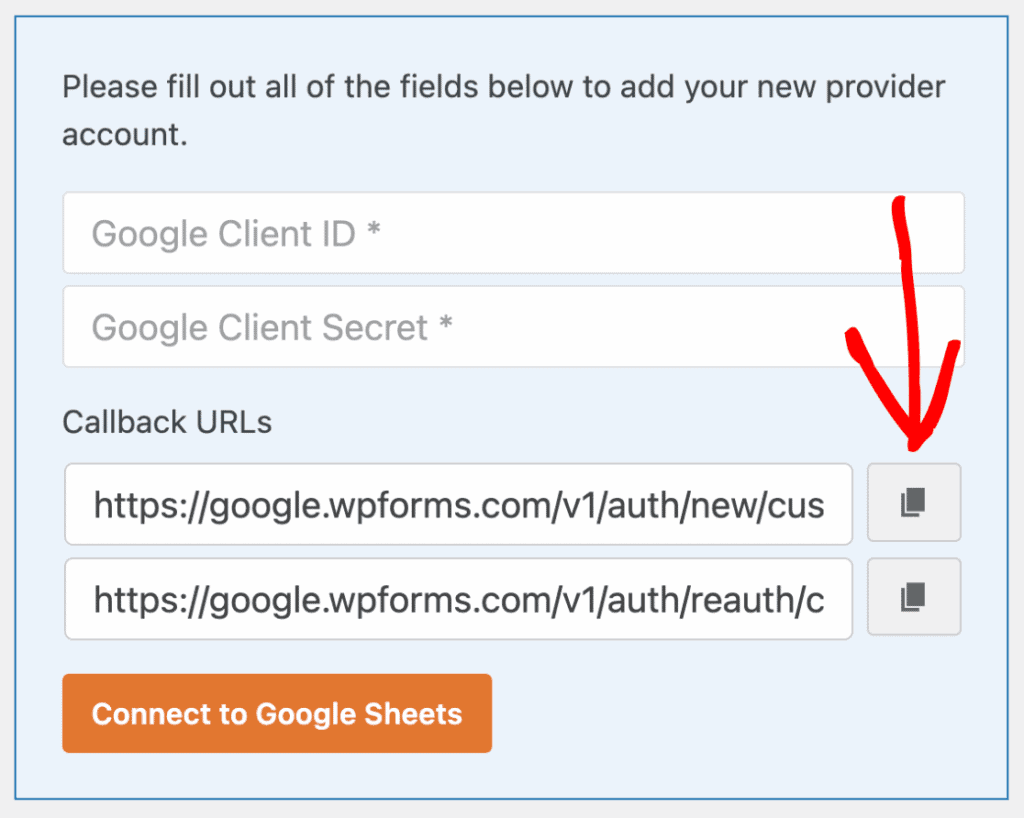
- Click ADD URI in the Authorized redirect URIs section.
- Copy the first Callback URL from your WPForms integration settings by clicking the copy icon.
- Copy the Callback URL and paste it into the URIs 1 field in your Google application settings.
- You can add a second URI after that by clicking ADD URI again.
- Click the copy icon next to the 2nd Callback URL in your WPForms settings.
- Go back to your Google settings and paste the 2nd Callback URL in the URIs 2 field.
- Then click CREATE.
- Your OAuth credentials will appear in a modal window. Click the copy icon to copy the Client ID.
- Next, go to your WPForms integration settings and paste the Client ID there.
- Go back to your Google application settings and copy the Client Secret.
- Paste the Client Secret into the Google Client Secret field in your WPForms integration settings.
Get Connected to Google sheets
Let’s complete the connection now that you have your Client ID and Client Secret.
- Go to Google Sheets and click Connect.
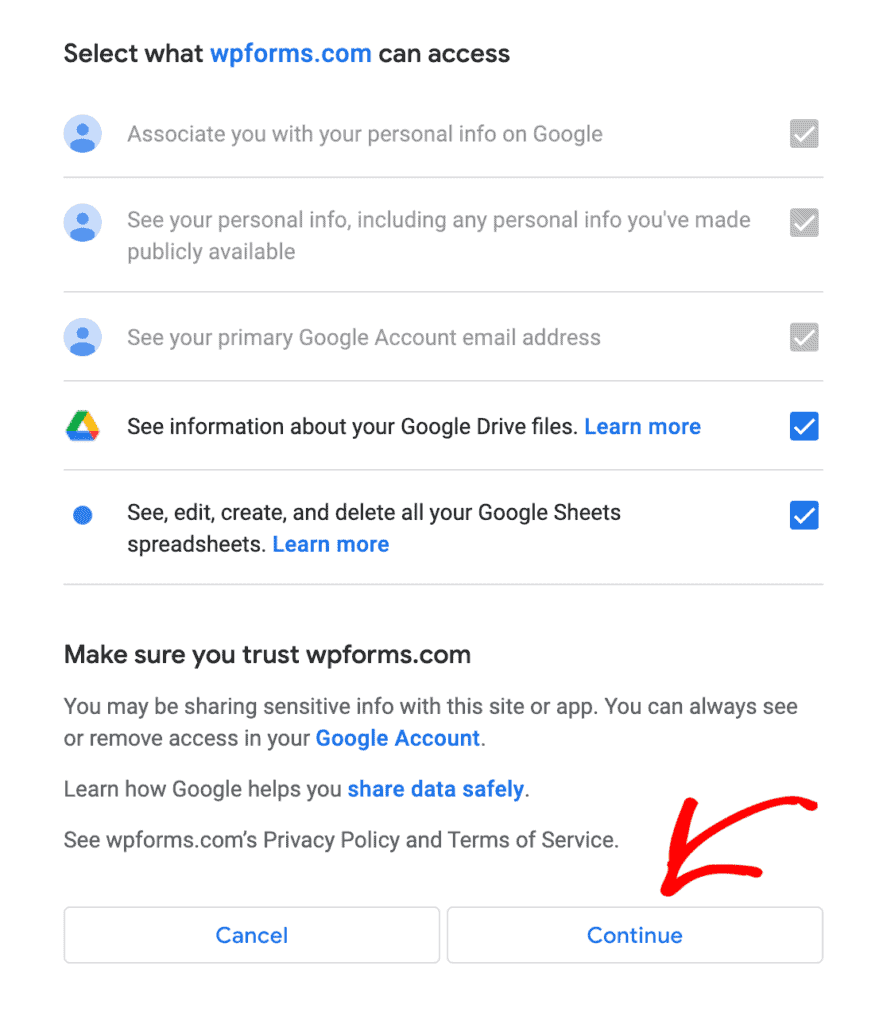
- After that, you’ll be redirected to Google’s authentication page. Your Google account needs to be granted access here.
- You can see, edit, create, and delete all your Google Sheets spreadsheets once you’ve selected a Google account.
- To complete the connection, click Continue.
- You should now see the green Connected status and your connection details under WPForms » Settings » Integrations.
Integrate your form with Google Sheets
The next step is to add a Google Sheets integration to your form now that you’ve successfully connected WPForms to your Google account.
- Open the form builder by creating a new form or editing an existing one.
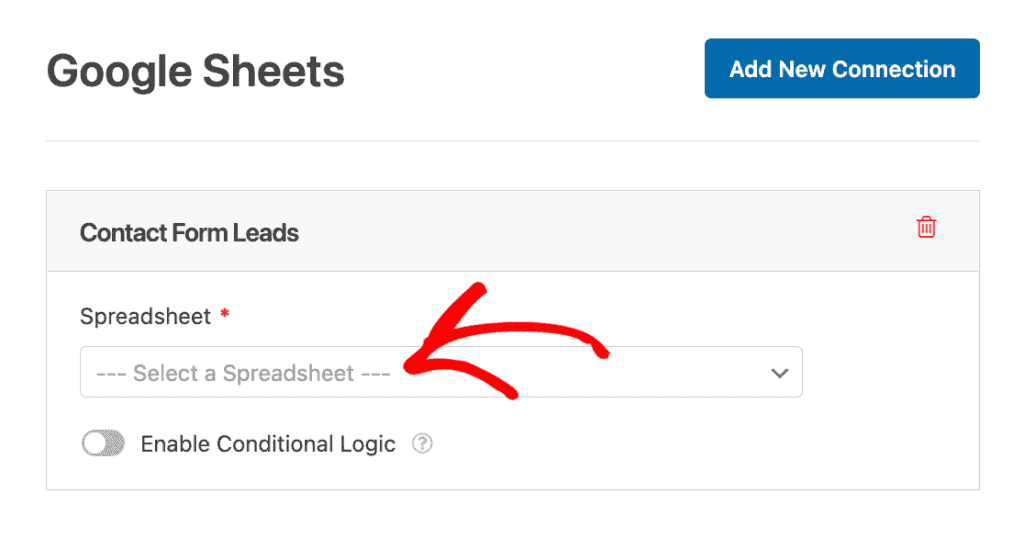
- Go to Settings » Google Sheets and click Add New Connection after you’ve accessed the form builder.
- Your connection nickname will appear in an overlay. The nickname won’t be visible to your users, so you can use whatever you want.
- Click OK when you’re done adding a nickname.
We’ll cover additional settings after you add a connection nickname.
Configure your connection
- Select a spreadsheet from the Spreadsheet dropdown.
- Using the dropdown, you can create a new spreadsheet or choose an existing one from your Google account.
- Search your Google account for a specific spreadsheet you’ve created.
- Using the Create a New Spreadsheet option, we’ll create a new spreadsheet.
- Select a spreadsheet to see additional settings. To help you keep track of your spreadsheet, we recommend adding a name to the Spreadsheet Name and Sheet Name fields.
Access Spreadsheet From Form Builder
In your connection settings, you’ll see a link icon under Spreadsheet when you connect your form to a Google spreadsheet.
Click the link icon to open your Google spreadsheet.
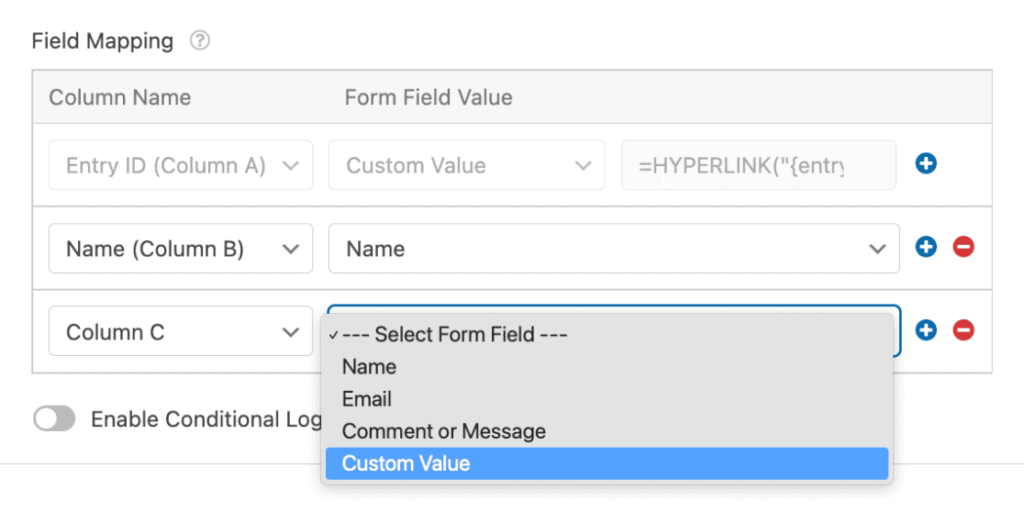
Start Google Sheets mapping
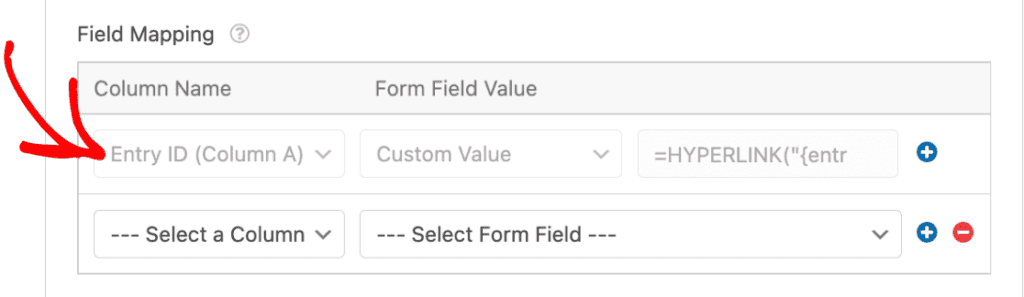
You’ll see two columns for mapping your form fields to your spreadsheet under the Field Mapping option.
- WPForms maps the Entry ID to Column A by default.
- A link will appear in Column A when the form submission is added to your spreadsheet. Click the link to go to the individual entry page.
- You can map form data to a new column by clicking the Column Name dropdown.
- Select a form field you want to map to the column in your Google spreadsheet. Click the Form Field Value dropdown and select the form field you want to use.
- Now we can see the names of people who submit our form in our Google spreadsheet.
Add Custom value
You can use a Smart Tag or Google Sheets formula instead of selecting a field from your form to map to your spreadsheet.
- Select Custom Value from the Form Field Value dropdown.
- You’ll see a new field where you can put your custom value.
- Click the Smart Tag if you want to use a Smart Tag for the custom value.
- Then you’ll see a list of Smart Tags. We’ll pick the Entry Date Smart Tag in our example so we can see when the form was submitted.
- In our Google spreadsheet, we’ll see when a user submits our form.
- Make sure you save your form once you’re done configuring your connection settings.